 Ripe Planner
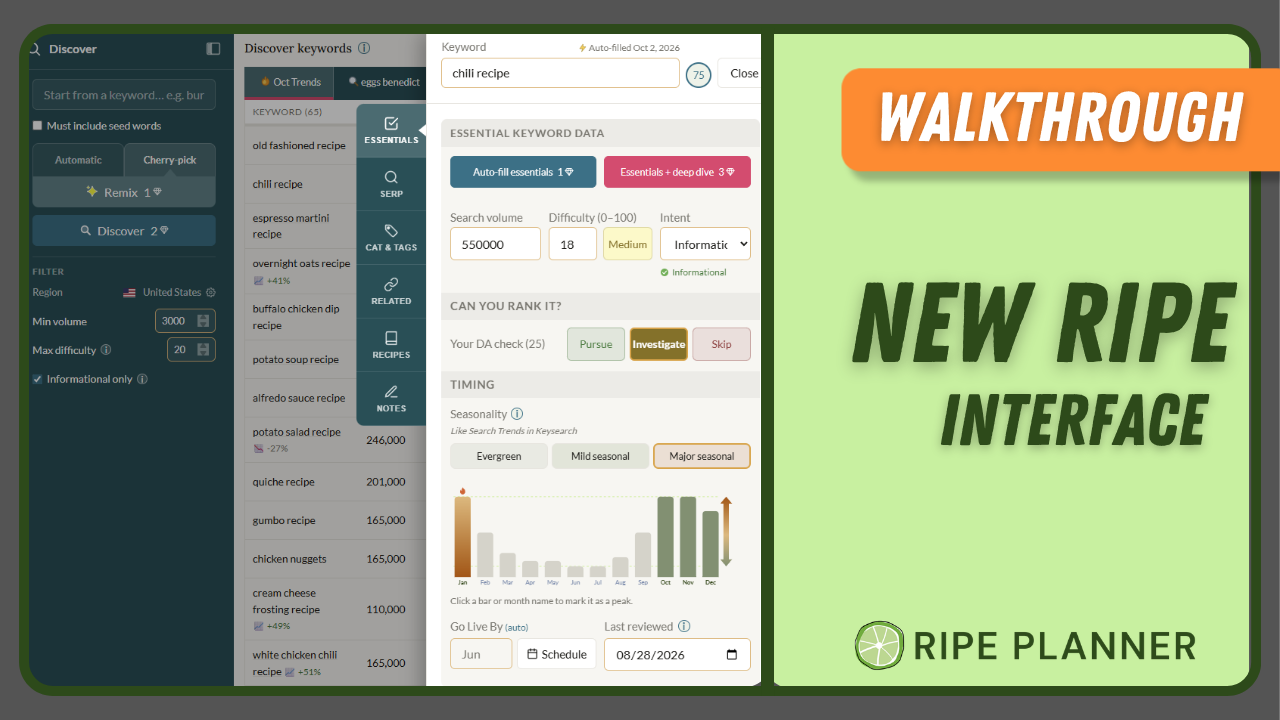
If you're wondering where I've been, I've been heads down on this one for a solid month. Ripe Planner has a brand new interface, and everything you already use is still here. It is just organized so you spend less time hunting for things and more time deciding what to cook next.
This is the full tour. Watch the video, or skim the sections below and jump straight to the part you care about. (I am saving the best little fun thing for the very end, so stick around.)
Bundles are now clusters, and that is the only thing to relearn
Keyword cluster is already a term the SEO world uses, so I renamed bundles to match. Where you used to look for bundles you will now find clusters. Everything else about them works the same, and everything on the dashboard is still on the dashboard. It just moved around a little.
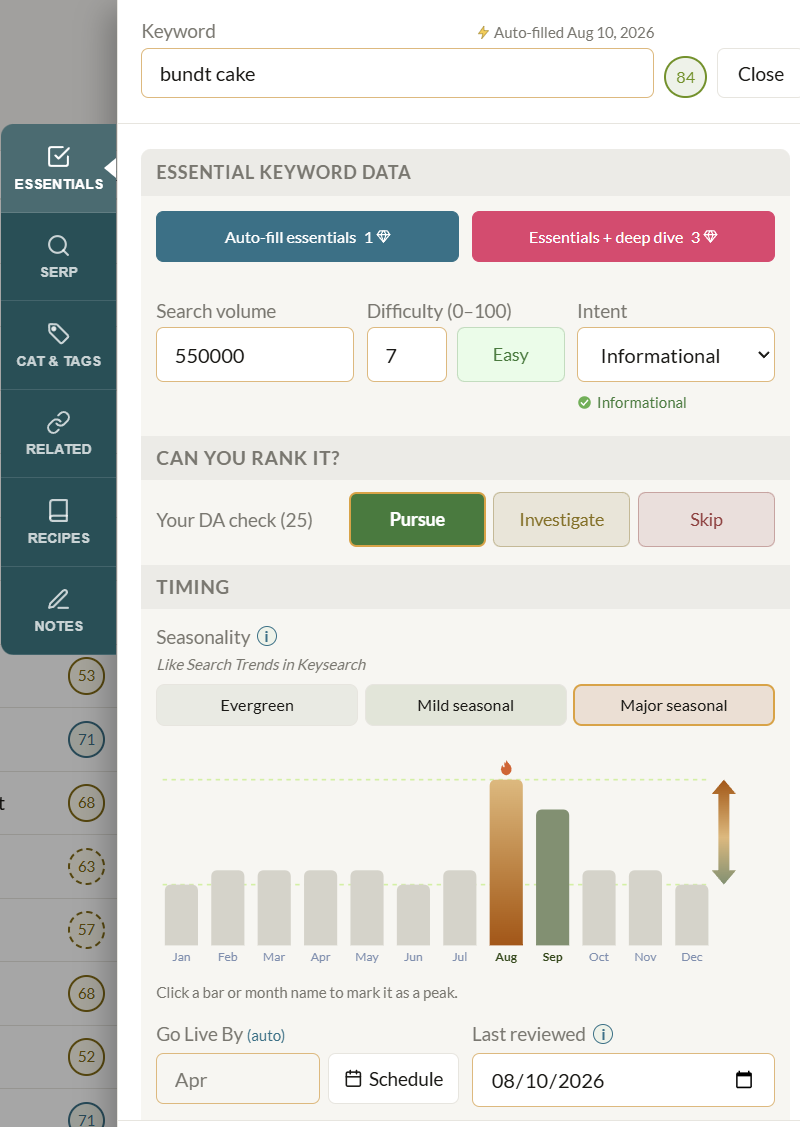
The keyword flyout finally has sections
The flyout used to be one long stack of everything. Now each section has its own tab, which means less noise while you work. Put your cursor anywhere on the screen and use your mouse's scroll wheel to scroll through the tabs. Click anywhere off the flyout and it closes. Click, scroll, check a setting, click away, done.
See the keyword flyout tabs in action
Run Essentials on everything and save the Deep Dive for the contenders
The Essentials tab holds what used to be the Essentials keyword data box, plus the autofill and the Deep Dive button. Essentials pulls the basics, which are volume, difficulty, search intent, and seasonality. That's enough for Ripe to calculate your due date so you can schedule.
When a keyword fits everything you need and you're getting ready to investigate it, that's when to run the Deep Dive. It used to be called the SERP auto check. If you already ran Essentials, you don't need to run it again. Just run the Deep Dive.
Watch the keyword essentials walkthrough
The SERP Deep Dive tells you whether you can win the search results
Ripe compares the top results from your website and tells you whether you can win. In my example, five of the SERP slots were just filler. That's a big win right there. Four more were within reach. You also get the backlink gaps, and Ripe's verdict on whether you can rank.
Scroll down and you will see the real results, each with its PA and DA, whether the keyword is in the URL, and the page link gap. Low value results in the top ten are marked out for you. Those are fillers the search engine is putting there because it doesn't have good enough answers. You are here to fill that.
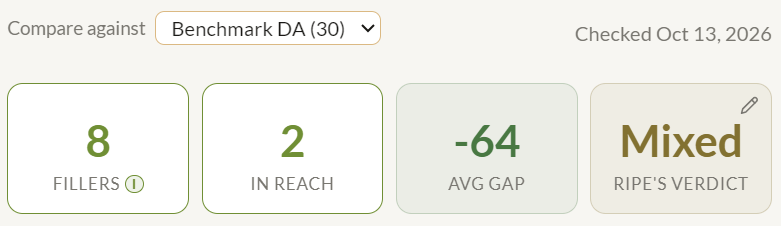
Note: In the example above, Ripe delivered a mixed verdict for SERP difficulty for "bundt cake" compared to a site with DA 30 and average backlinks. Mixed means you can rank, but you need to write a stellar post.
Below the results, you'll find a few more things worth a look.
- Recipe cards. The top three recipe cards that come back for that search.
- Popular products. Handy if you like to work them into a recipe for another layer of SEO, or reach out for a sponsorship.
- People also ask. The questions that show up in the little drop down on Google, plus how many of the top results really answer each one. Find a question nobody is answering and put it in your post.
- Related searches. These come straight from the data source, so they have not been through Ripe yet and are not marked for intent. Add one to your library for free (enter the rest of the data manually), add it with Essentials, or add it with a Deep Dive if you already know you want all the data.
- YouTube results. The top five videos for that keyword.
Watch the SERP Deep Dive walkthrough
Linked keywords, recipes, and notes each get a tab
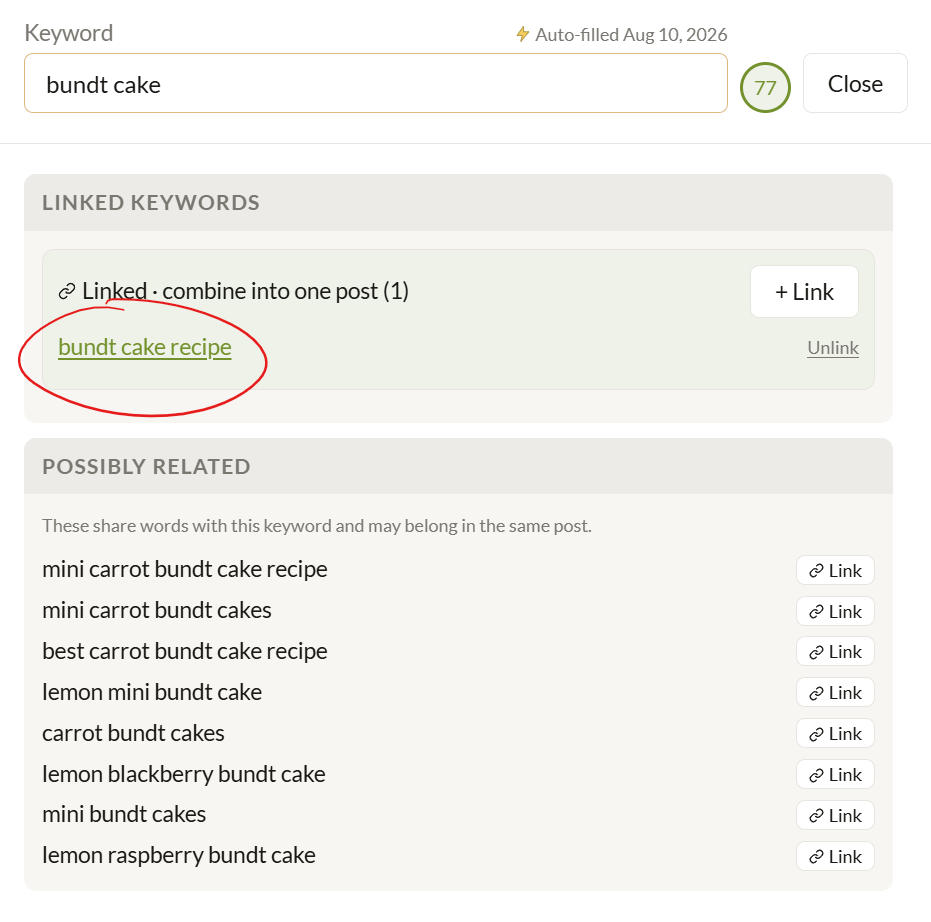
Categories and tags are the same as before. Linked keywords are your keyword clusters, the ones that would all work in one post. If you have none linked, you can link them yourself or check what Ripe suggests. It picks up similar words, so blueberry waffles will bring up blueberry ice cream. What you're really looking for is a pairing of blueberry waffles and easy blueberry waffles recipe. Or bundt cake and bundt cake recipe. These are keywords that belong together in one post since they share the same topic.
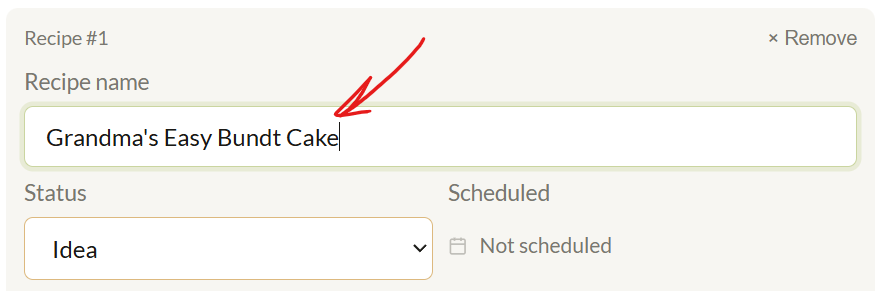
The Recipes tab starts with one recipe record, and your keyword status is based on it. It starts as an "idea." When you decide to make it, type in a recipe name like Easy Blueberry Waffles, and that name shows up everywhere recipe records show. A keyword can hold more than one recipe, which is handy if you develop recipes for multiple clients or create unique versions of a great keyword every year.
The Notes tab is where the human part goes. Fill in your unique angle. What makes this recipe yours, how did you test it, is there a family recipe being passed down? Add research notes, must words, and common ingredients from the top results. The FAQs fill in from the People Also Ask questions as soon as you run a Deep Dive. The last field is for stand out ideas, so once you figure out how your post can stand out, write it there and it is tracked.
See the keyword notes section in action
Use "To Schedule" as your shortlist, and drag unscheduled recipes onto the calendar
The recipe planner works the way it did before. The featured status on the planner view defaults to "To Schedule", and you can change that in settings. You can also make your own custom status and feature that one instead. Mark a keyword "To Schedule" as you browse and it lands on your shortlist. Then in the planner, you can decide how you want to schedule those.
If there are any leftovers after scheduling that you decided not to make, you can remove them easily from the "To Schedule" list. Go to My Keywords, filter for the status "To Schedule," select everything, and set the status to something else. The default is idea.
The new list of keywords in the planner is Unscheduled Recipes. Once a recipe has a name on its recipe card but no date, it shows up there. Drag it onto the calendar and you are scheduled.
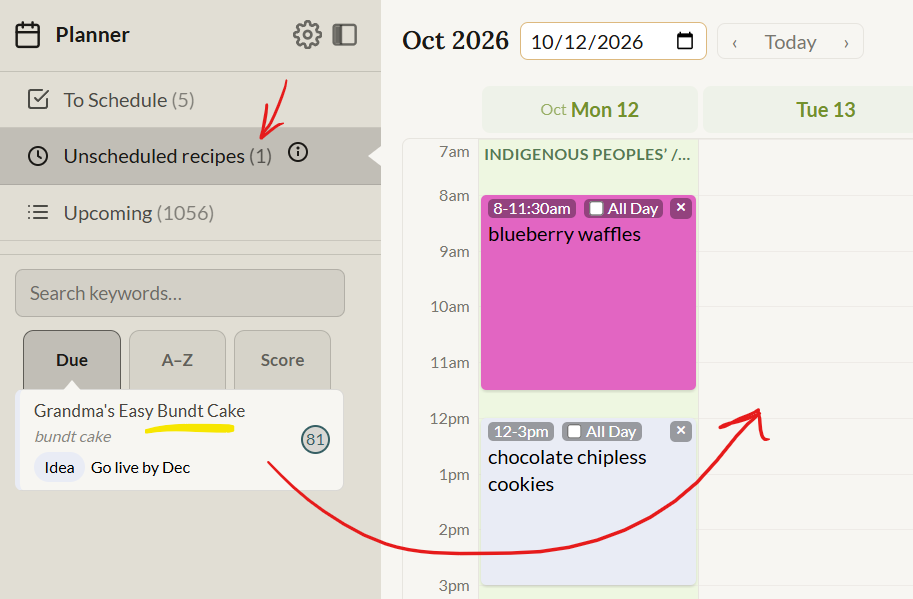
Watch the To Schedule shortlist section of the video
My Keywords starts simple and lets you get nerdy
By default the My Keywords tab now shows fewer columns, only the basics. Keyword, score, volume, difficulty, category, and Ripe's proprietary Go Live By date. If you're an analytical thinker like me and want to see everything, you can turn on any column for every field you want. You can also drag columns into a different order.
The keyword filters were previously hiding behind a button you had to click to access them. Now they are open on the left by default. The new keyword filter is for difficulty by word rather than number. Switch it from the number to the word and you can ask for only the easy ones. Applied filters show along the top, so you can x them out one at a time or clear them all.
Discover shows you which keywords peak next
Everything from before is still in Discover. But there's a new column for Next Peak which shows you the next upcoming peak month for that keyword. (Many keywords have multiple high months) You can sort your Discover results by that new Next Peak month.
The filter to view only informational intent used to sit at the head of that column, but now it lives in the left column with the other filters. Filters are always saved at the account level so you don't have to reset them every time you're in keyword research mode.
See the Discover feature in action
Content Gaps can now be filtered by the month a keyword is due to publish
The navigation and filters moved to the left column here too. The new filter is called Due Month and it correlates to the Go Live By month you see elsewhere in Ripe. Say it's the end of October and you want to know what to make in November. Pick November as the Due Month.
You can narrow even further by category, like brownies and bars. Add a filter for "missing on my site but my competitors have it," and you're looking at keywords from your own library that are due next month and that at least one competitor has covered but you haven't. My personal library has over a thousand keywords (because I'm a keyword hoarder), and this narrowed it to five recipes I should make right now.
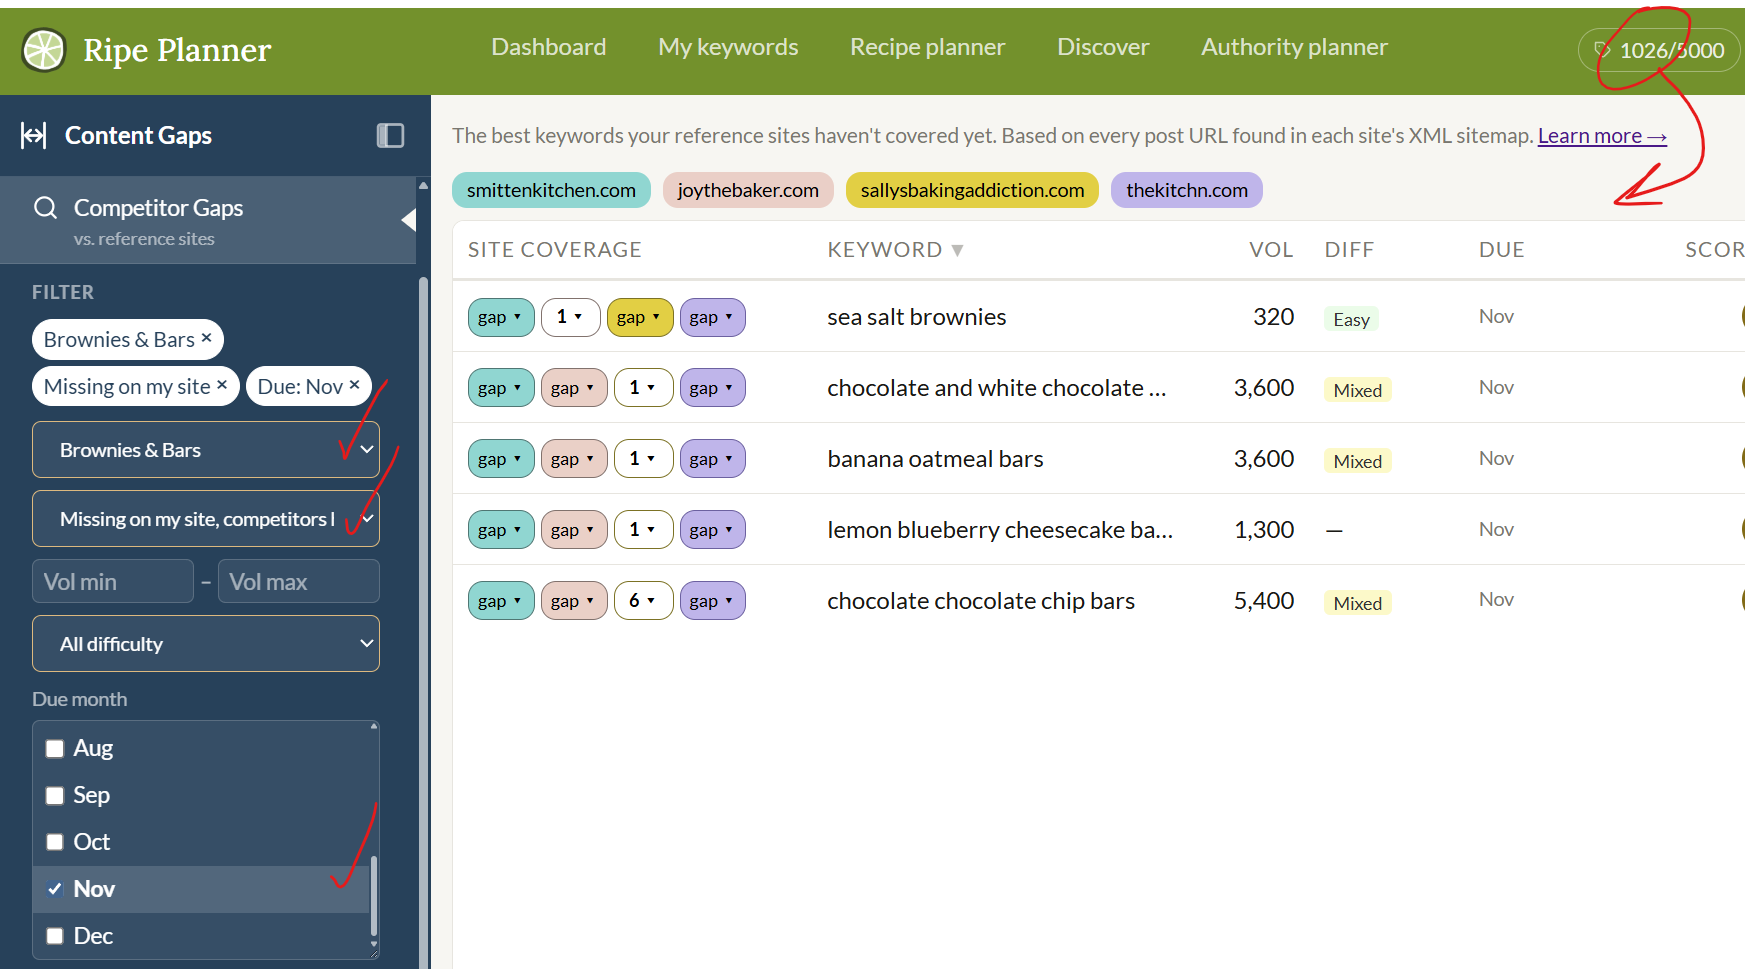
When you pick one, the schedule button takes you to the calendar so you can drag it into place.
The competitor gap also now supports a fourth site! And the table has columns for the due date, volume, and difficulty, so there is more data available when you are deciding what to make next.
Watch the content gaps section
Small screens
1. If your account is new, set up your reference sites first
If you have not done this yet, do it now. It is what makes the Keyword (SERP) Deep Dive and Content Gaps most useful.
- Go to Settings, then General, and scroll down to the reference points.
- Add your own website first plus up to 3 of your competitors.
- If you are a recipe developer working with multiple clients, you can set a benchmark DA instead of actual websites. Pick something fairly low so you are reaching a lot of bloggers. Or use the 4 reference site spots to fill in your top 4 clients.
- After you enter each one, fetch the DA and backlinks, then scan.
- Check the box that says "this is my site" if the first website is yours. This will allow you to use extra filters in the content gap feature of Ripe.
- Choose your default reference. When you run a SERP Deep Dive, Ripe measures the results against the DA and backlinks of whichever site or benchmark you set.
Back in Content Gaps you will now see a breakdown of your own site, which is a good way to spot where to build next. Switch to the competitor gaps, apply your filters, and you can see where the sites differ. When one site has a recipe for a keyword and the others do not, you can make your own version, or look at what the other three have and find your angle.
Follow along in the video to setup reference sites
2. Build your keyword library, because everything works better with more keywords
Every other feature in Ripe gets stronger as your library grows. So focus up front on building your keyword library. Any time I find a keyword with good data that's a recipe I would enjoy making, I save it. It might be for a different season. But if I don't save it now, I won't have it when that season comes around. Every good idea you come across, start saving it.
The fastest, cheapest, easiest way to build your keyword library is by using the Discover tab monthly trends. They update every month and they cost you no credits to run, because Ripe already provides the data. Then, if something in the trends list interests you, take it into Discover or Remix and find even more related keywords on the same theme.
Watch how to build your keyword library
3. Once you have enough keywords, authority clusters start doing the planning for you
The Authority Planner works the same as before, and your filters are saved and apply across the cluster types. Once your library is big enough, you will begin to see more clusters, and there are three kinds.
- Concept clusters. One flavor in different formats of food, like Bananas Foster cupcakes, cake, or cheesecake. You are building authority on the Bananas Foster theme.
- Topic clusters. One type of food in different flavors. If you are building out cheesecakes, this is where New York, strawberry, and blueberry show up.
- Menu clusters. A seasonal timing cluster. Start with the season or occasion and Ripe leads you to a roundup of recipes for that event.
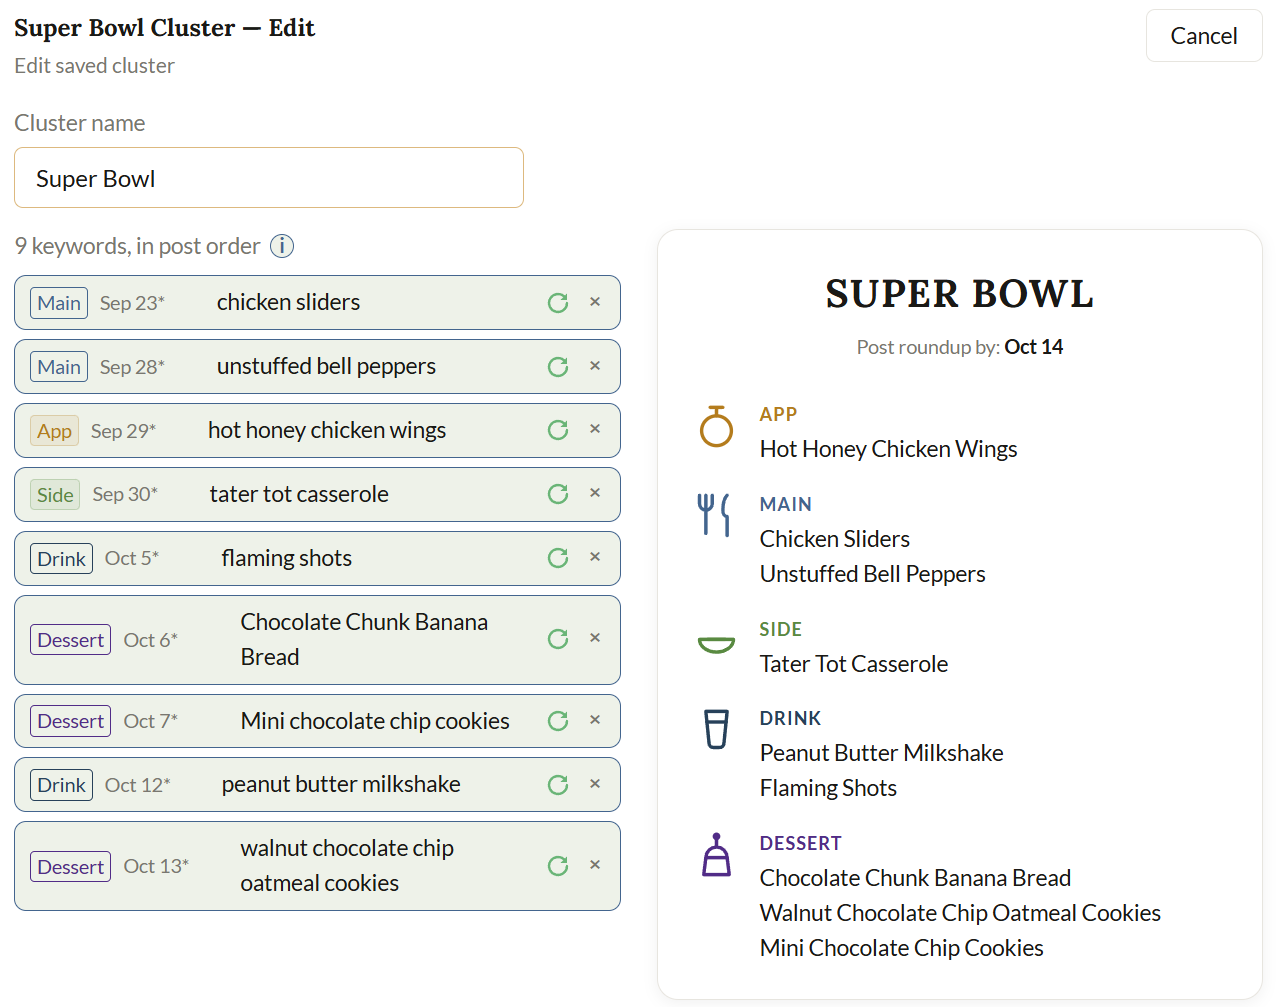
Super Bowl is a good example. It gets high search volume in January and February, so in September and October I start building recipes for a Super Bowl roundup. You want to build it early enough to gain momentum before the actual peak search month.
To build a menu, start with a season or occasion. Ripe scores each suggestion by timing, so a chili recipe with a January peak makes sense for a February game. Pick a main meal keyword, then your appetizers, skip any category you don't want, add sides, and pick a dessert.
Then review your cluster. The dates are estimates for when each piece should be posted. You can swap a keyword for something different or remove it, and the preview updates. Save the cluster, press the schedule button, and everything goes to your To Schedule shortlist. Then you drop each recipe onto the calendar at whatever cadence works for you.
Concept clusters are a great source of ideas too. My keyword cluster for creme brulee shows three flavors in different formats, in score order. Ripe recommends the order to post them, which can differ when the peaks differ, and it lists rough content ideas underneath, like creme brulee brownies. Take one of those into Discover and see what options turn up.
Watch how to build a menu for roundup posts
Pick a color theme, then try dark mode
Here is the fun part I promised. Click the logo and you can choose from five color themes. Each theme has its own colors, and the dark modes are friendlier to look at now too. Set your mode to light, dark, or system in settings.
See the theme changer in action
Tell me what you love and what you hate
I would love your feedback, positive or negative, on any feature or change. If you hate change and want something back the way it was, tell me. I won't necessarily put it back (haha), but if enough people don't like something, I want to hear it. And if there is a feature you want, big or small, drop it in the suggested feature box and I will add it if I can.
Thank you for being here while this comes together. Now go save some keywords.